

Design Clinic Website is a fun process for me, but I know it’s not that easy with most healthcare business owners…
Hence why I have been writing these instructions to help you set up a beautiful and working WordPress website.
This is part two of my tutorial on how to set up a WordPress website.
If you have missed the last article I have written, you can read it here => How To Set Up A WordPress Website From Scratch (FAST!)
For those who have read it already, you have already installed your first WordPress website.
However, it’s looking pretty barebone right?
I’m guessing you’re seeing something like this, a default WordPress theme – Twenty Seventeen:

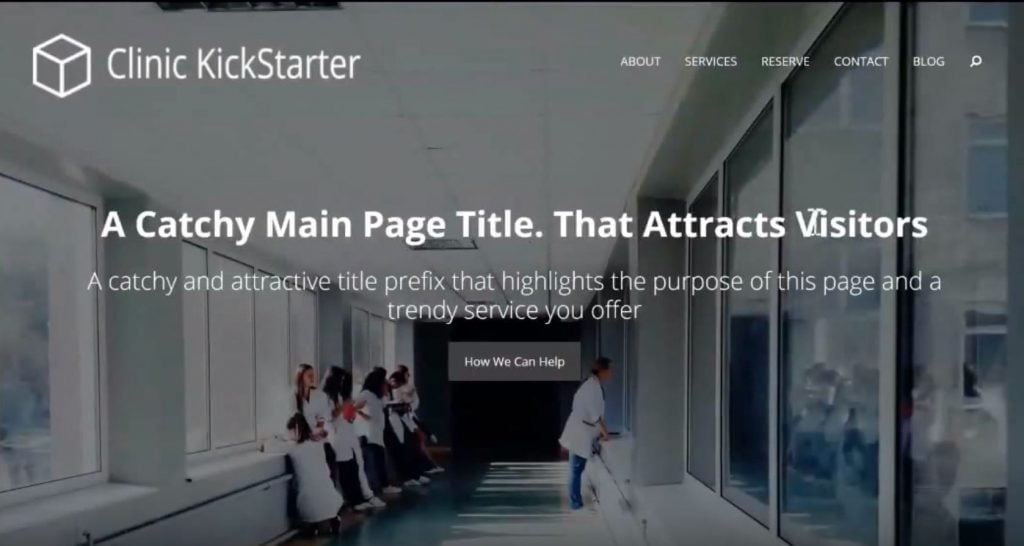
But don’t you worry, because if you follow every single step that I’m about to reveal in this article, you will end up with something like this instead:

Let’s keep reading!
Wait…before we go on…
I want to invite you to join my PRIVATE FACEBOOK GROUP – Kickstart Your Clinic’s Website.
Make sure you ask me any questions that you have in how to set up WordPress website and I will help you kick-ass your online marketing as well!
Get yourself a copy of My Customized Clinic Kickstarter Template!

BREAKING NEWS! A Quick Review of my Surface Pro 2017 Edition!
Many probably have wondered how I am able to run my own clinic AND are able to create contents to continue promoting my agency business.
Let me tell you, to be like me, you’ll need a powerful laptop that you can carry around with you at all time.
You also need to make sure it has a strong battery that will last the whole day.
Last but not the least, you need a powerful, POWERFUL computer that allows you to do all the digital marketing at the same time.
So I’m going to spill the secret today, my ultimate weapon choice – Surface Pro 2017 Edition.


I’m not gonna spill too much today, but you really gotta know that it is the most powerful tool I have ever used!
Anyways, let’s keep reading on and be sure to expect some in-depth review for Surface Pro 2017 Edition.
Let’s go!
Design Clinic Website Is So Simple!
There’s total of four steps in creating a designer-looking WordPress website:
- Install my customized WordPress Template – Clinic Kickstarter.
- Change the layout and color of individual static pages in regular WordPress Page Editor.
- Further changing the color, font, typography, layout with Customizer.
- Getting new pages created and duplicate your favorite design of other pages.
You will learn all of these steps in the next little while, but today, let’s talk about the first step.
Step 1. Installing the Premium WordPress Template – Clinic Kickstarter
If you have seen the previous article about set up WordPress website, you’d have seen this video:
You’d have to download and install my customized WordPress Template – Clinic Kickstarter.
Follow the instruction from timeframe “3:50” and delete all the unnecessary plugins and install “All-in-One Migration” plugin to install the zip file you just downloaded from me. But I’ll break it down completely here for you…
1. Add New Plugin in WordPress Dashboard
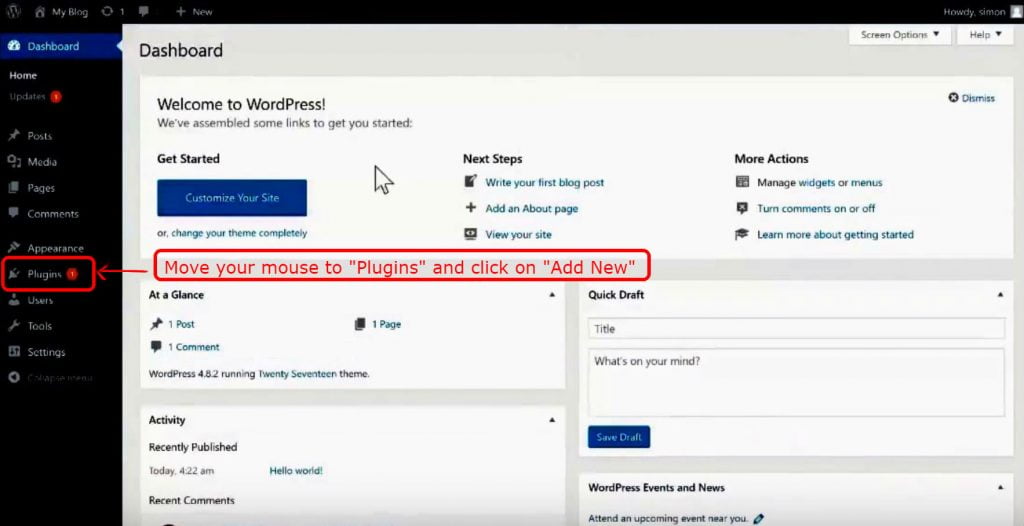
When you first entered your WordPress Dashboard, you will notice on the left-hand side there’s a bunch of icons with descriptions. These are what is special about WordPress, which is a Content Management System that allows you easily edit your website in the navigational menu.
*If you like to know more about WordPress, Wikipedia and WordPress.org will give you a lot more in-depth information.*
You want to add a new plugin, so move your mouse cursor to “Plugins” and click on “Add New”.
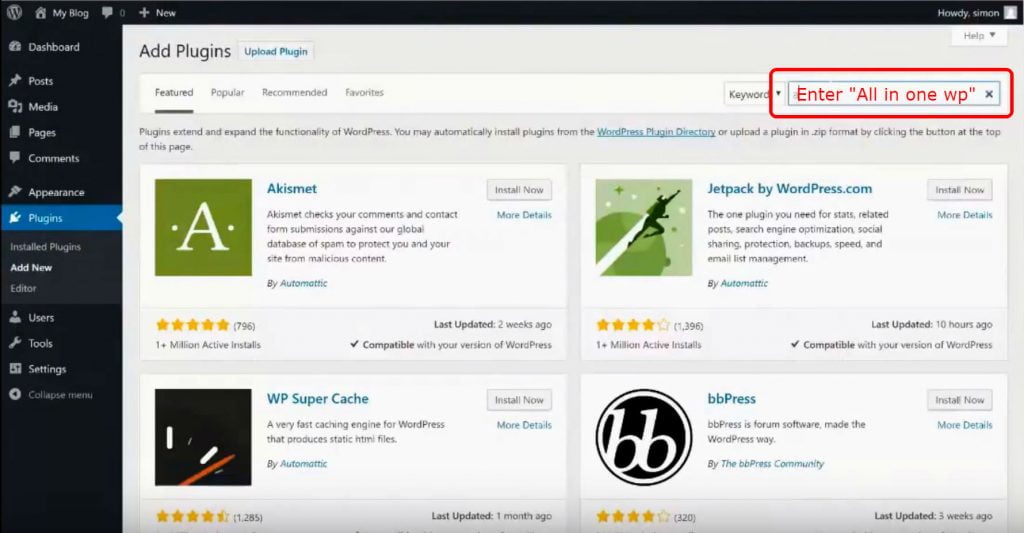
At the search bar, enter “All in one wp migration”.
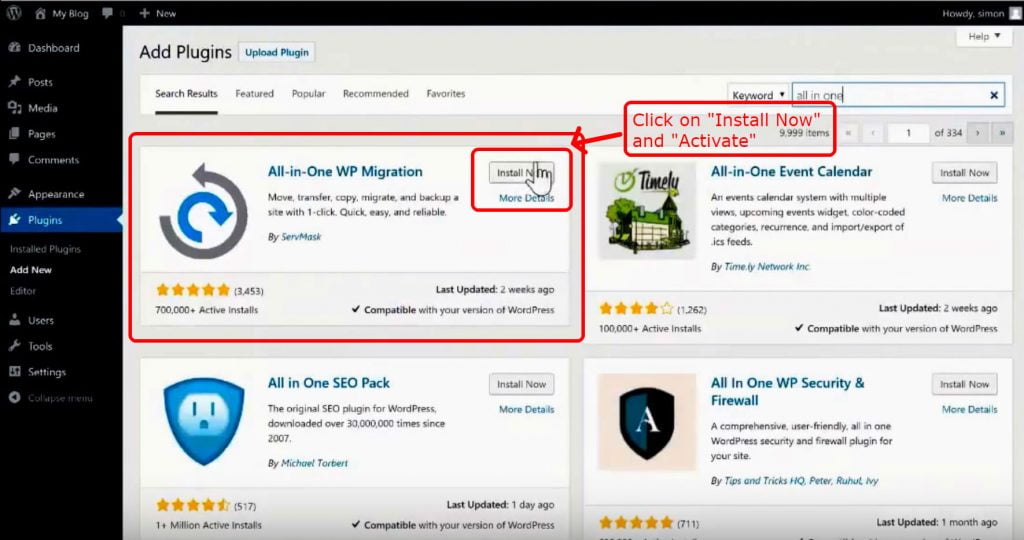
Once you see the “All-in-One WP Migration” plugin, click on the “Install Now” button, and “Activate” it after.
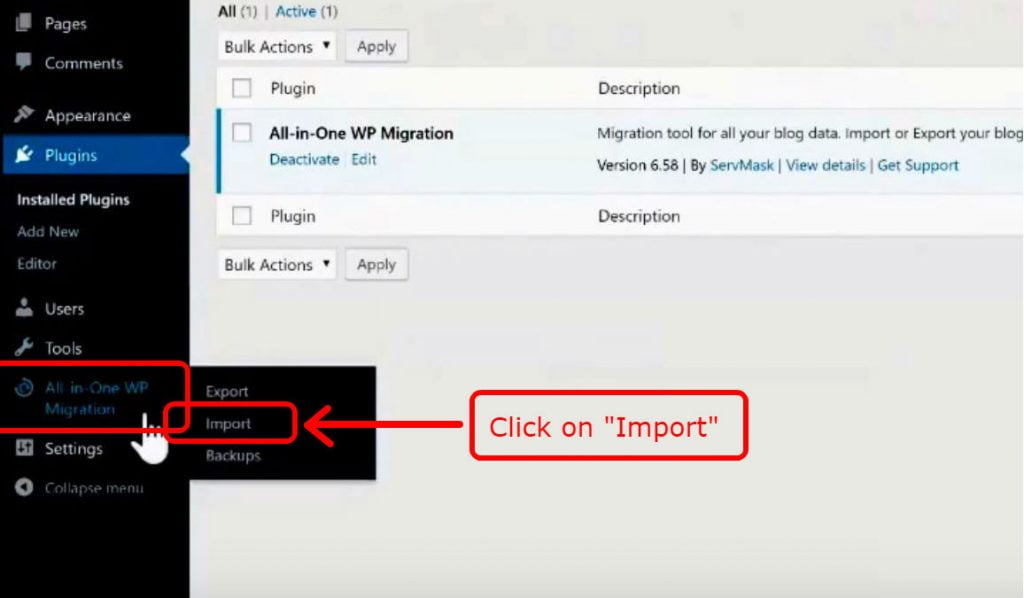
2. Import the Clinic Kickstarter ZIP file
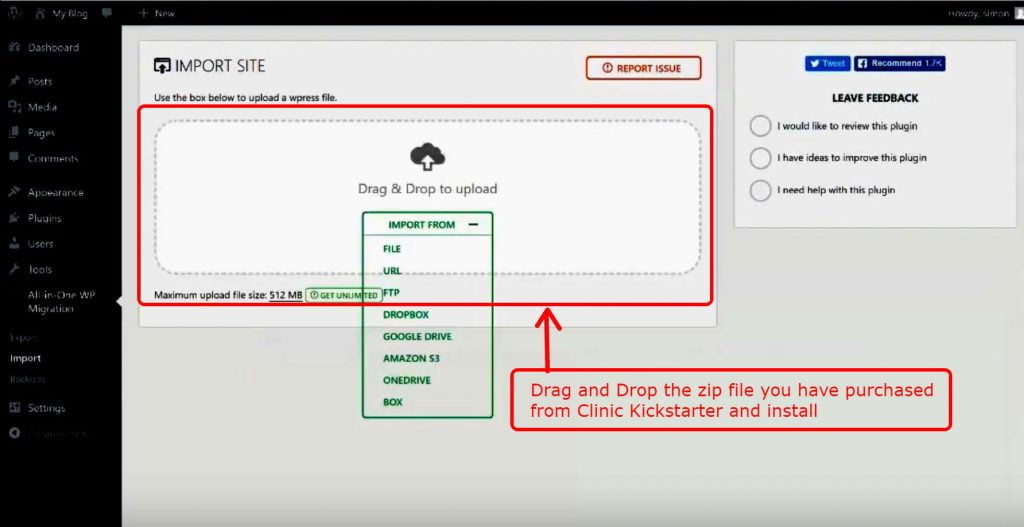
Now that you have the “All-in-One WP Migration” plugin, let’s move your mouse cursor over it and click on “Import”.
Remeber that you have downloaded Clinic Kickstarter? If not, go on and make a purchase first.
Once you have completed the purchase, you will be able to find a zip file in your email or your account area.
Download that to your desktop, then drag and drop into the dotted area and start the installation.
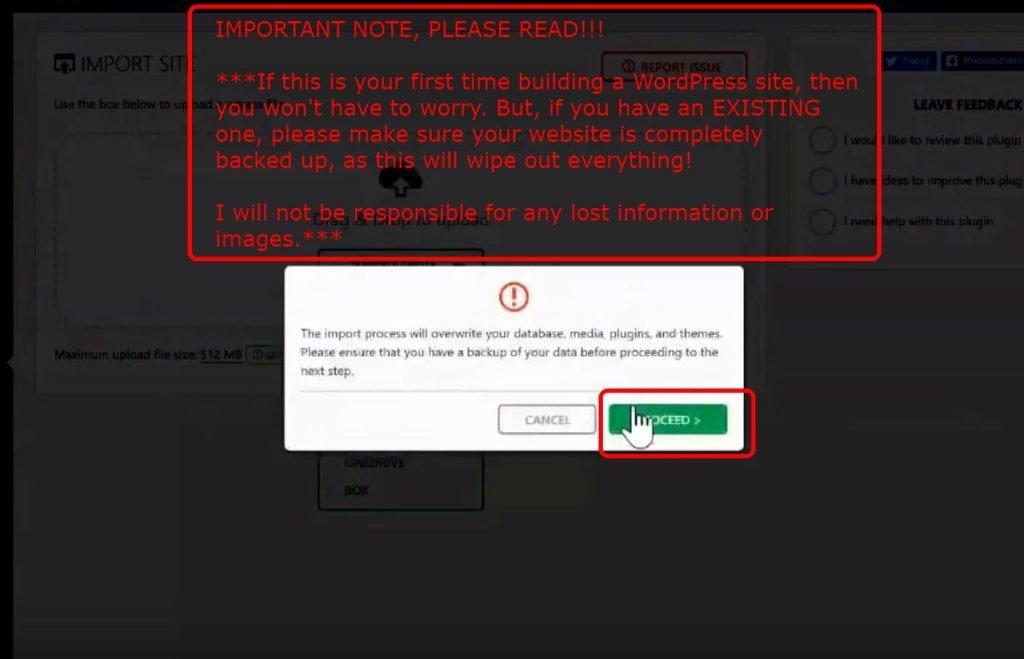
***IMPORTANT NOTE, PLEASE READ IT BEFORE PROCEEDING!!!***
This is an extremely important step, without reading the disclaimer properly here, any losses of your original website data will not be my responsibility.
Most of my clients have already built WordPress websites, of course, there are some that haven’t done so yet. So I’m mainly targeting those who have built it already.
If you go ahead and proceed with the template installation without backing up any of your WordPress website data, EVERYTHING WILL BE WIPED OUT!!
So, my suggestion is to go to your cPanel and create a subdomain, install SSL certificate, then install WordPress on your sub-site. Once you have finished designing your new website, you can then use “All-in-One WP Migration” plugin to “Export” the website setting, then “Import” into your main website.
You can follow the previous blog post, How To Set Up A WordPress Website From Scratch if you don’t remember how to get into your cPanel and proceed with the WordPress installation.
Of course, if this is too difficult for you, you can always contact me and ask me to install it for you.
Now that you have WordPress installed in your subdomain, we are going to proceed everything in it.
Let’s keep installing the template…
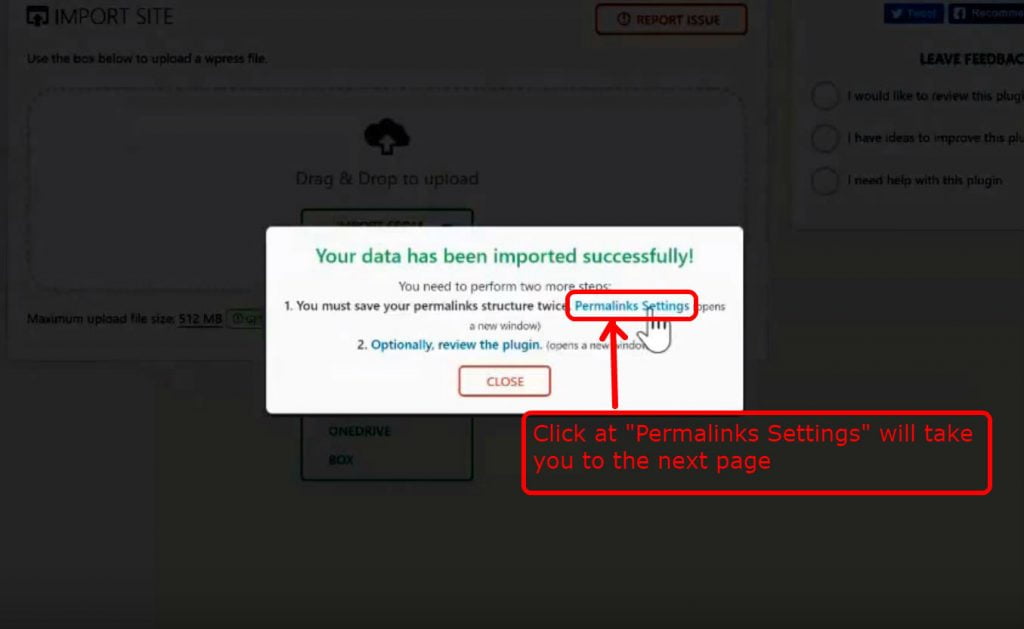
Once the process bar goes to 100%, it will display a pop-up window telling you that your data has been successfully installed.
When you click on “Permalinks Settings”, you will be taken to the login page of WordPress.
3. Change the Website Settings
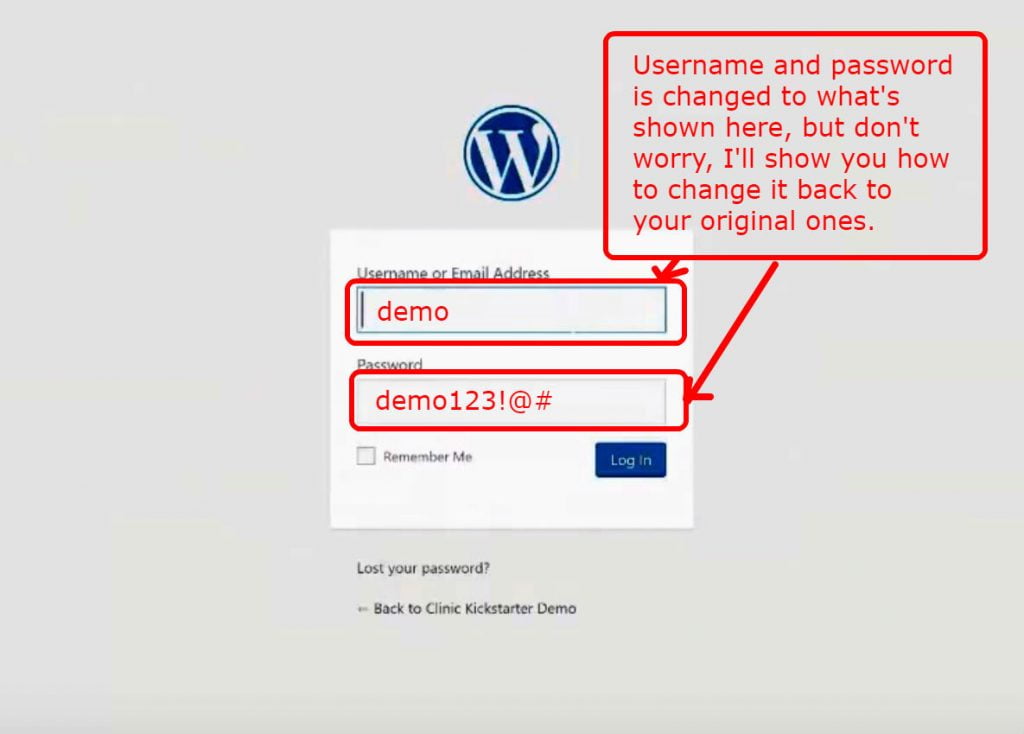
Your original username and password will not be available at this moment.
But do not be scared as I will show you step-by-step in making it back to your original settings again.
For now, type in “demo” at Username bar, and “demo123!@#” at password and press “Log In”.
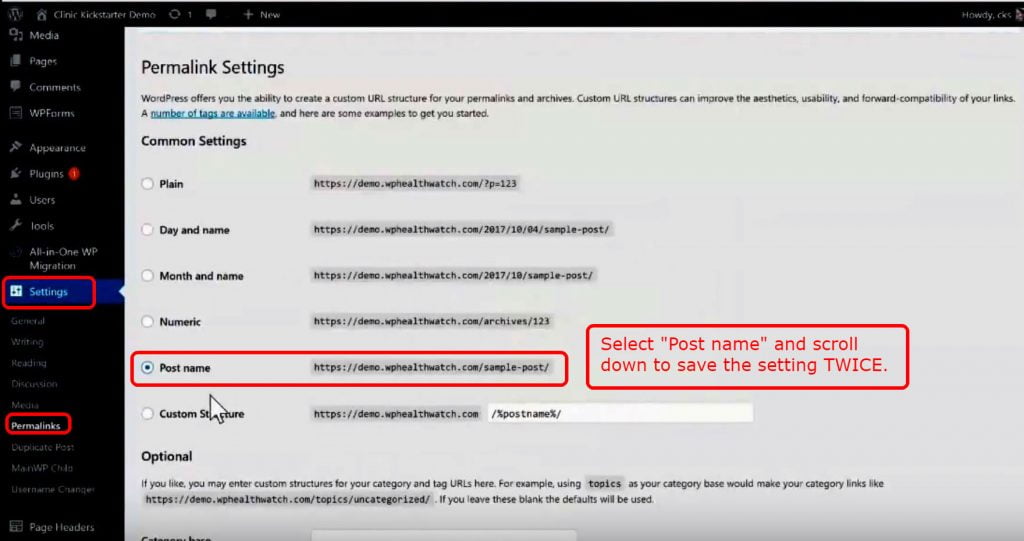
Once you have logged in using the provided username and password, you will be redirected to “Settings” page and in here, you will need to change your “Permalink Settings”.
Click the circle besides “Post name” and scroll down and save it twice.
Next, click on “General” under “Settings”, you will change all your website settings here.
These include “Site Title”, “Tagline”, “WordPress Address (URL)”, “Site Address (URL)”, and “Email Address”.
Once you have finished editing them, scroll down and save settings.

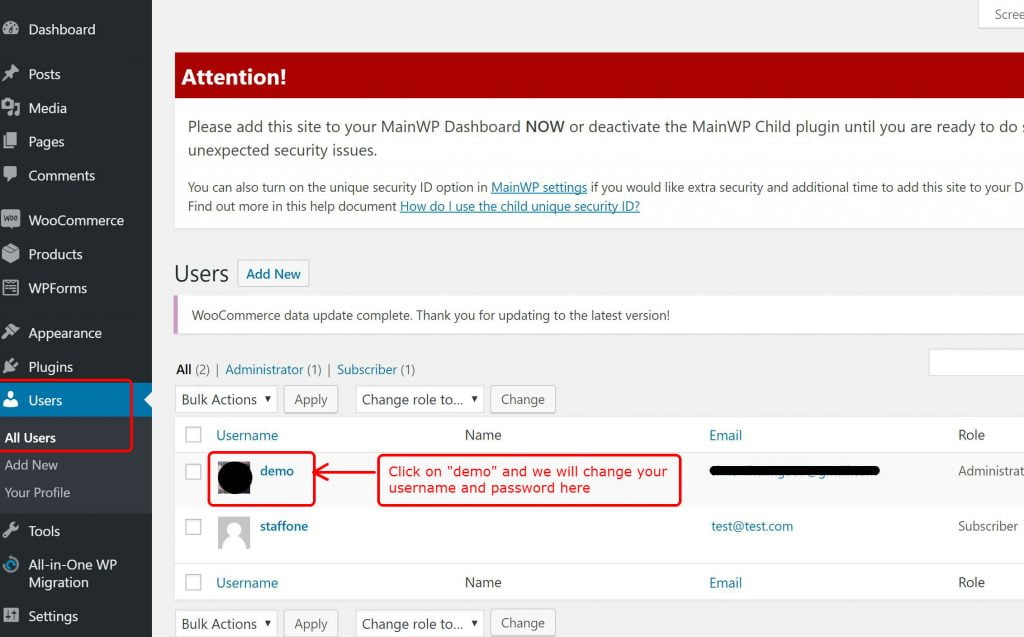
Now you need to click on “Users” and “demo” in the following page. We will change your username and password there.
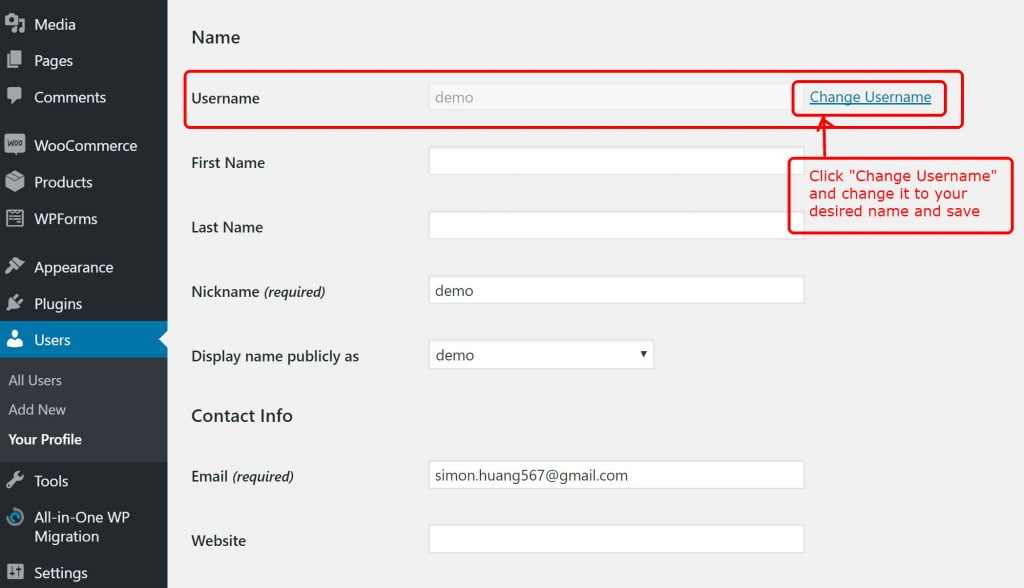
Click on “Change Username” besides the bar labelled “demo”, this will allow you to change it to your own username. Click save and scroll down.
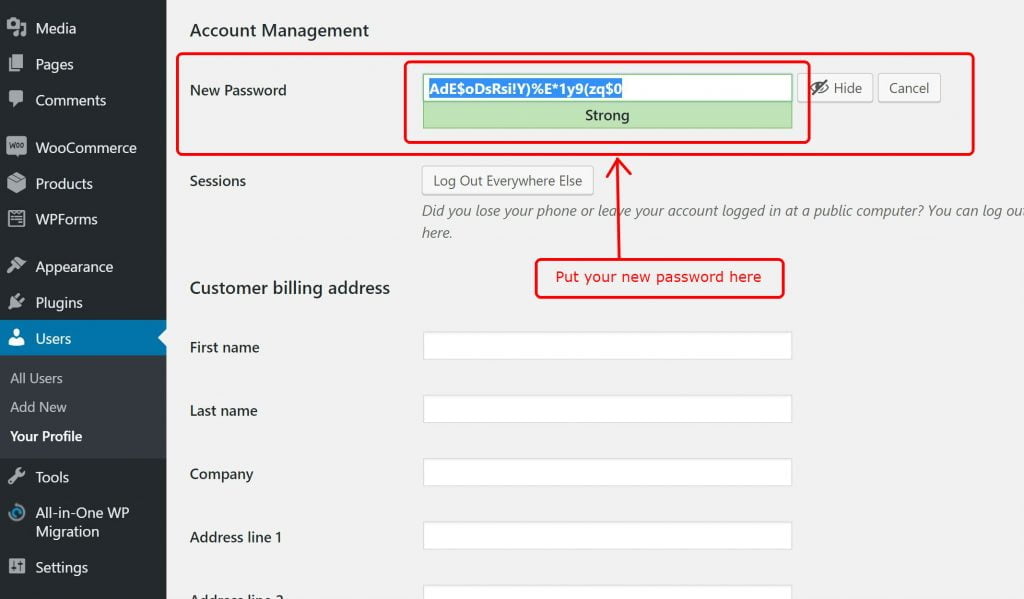
You will need to click on “Change Password” and you enter your own password here. Make sure it’s strong though. Then, scroll down and click “Save”.
Once you got every setting back to your original one, you should then click on the top left corner “Home icon” or it should be your website name.
You are done and there’s your beautiful WordPress website template.
Enjoy!
Conclusion
It does look pretty difficult at first to start setting up your WordPress website.
However, it has always been my goal to make it easier for every healthcare professional entrepreneurs that are willing to learn to run a proper online business and establish branding properly.
I will continue to improve and update my customized WordPress Template – Clinic Kickstarter.
And again, I hope you find this tutorial useful.
If you like this blog post, please don’t be shy and share it with your friends via the share links floating around through Facebook, Twitter, Google+, or even email to your friends.
It will not just make my day, but my year!
Thank you!
Be sure to read on to my next article on Free Online Booking System Set Up Guide – To Automate Daily Tasks For New & Established Clinics…
PS. If you love my articles and find them helpful, could you leave me a review on Google? It will not just make my day but my decades!

